Getting Started
Important
Prerequisites
To follow this tutorial and build the module, you will need:
- jamovi: Make sure you have the latest version of jamovi installed.
- R: You need R installed on your system.
- R knowledge: Analyses in jamovi are written in the R programming language. This tutorial assumes you have a basic understanding of R logic.
- An IDE: We highly recommend using an IDE such as RStudio or VS Code for writing your R code.
What Are We Building?
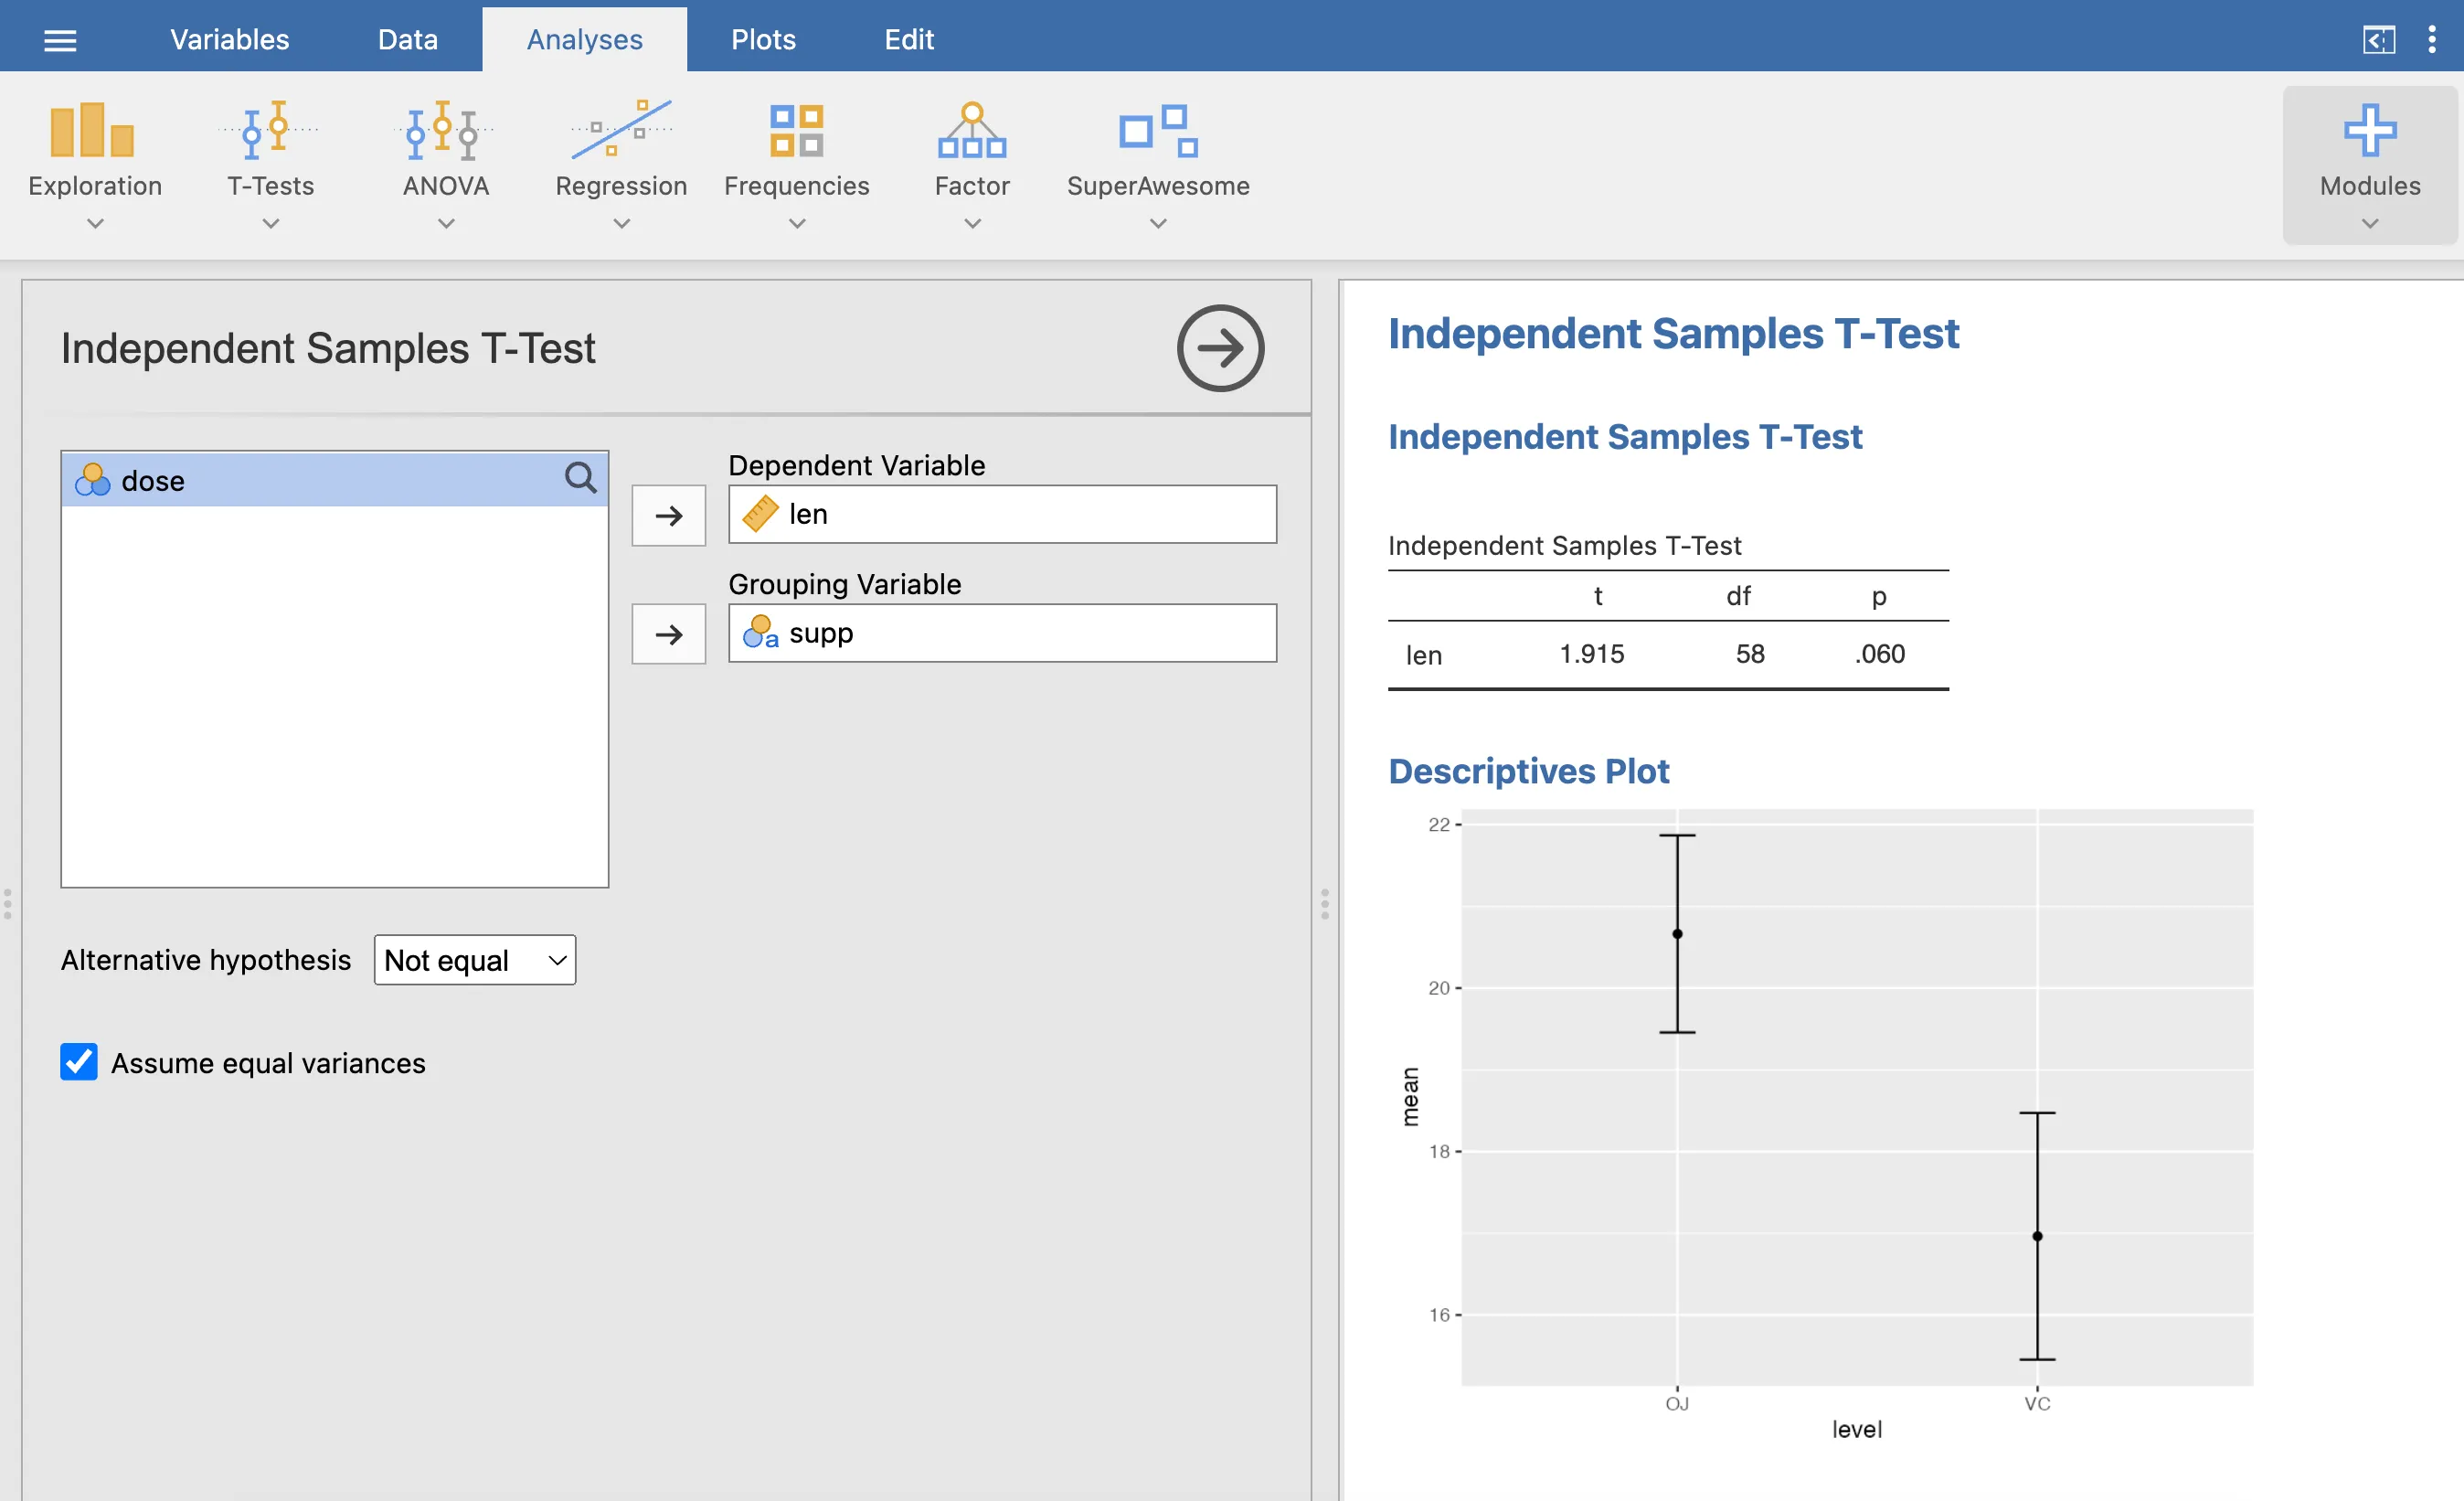
Throughout this “Getting Started” series, you are going to build a fully functional SuperAwesome module from scratch. By the end of the next few pages, you will have created an interactive analysis that includes a responsive UI, robust data handling, an APA-formatted table, and dynamic plots:
1. Install jmvtools
The jmvtools package provides the essential tools for building and debugging jamovi modules. You can find the source code on the jmvtools GitHub page.
To install it, run the following command in your R console. Note that we are using the repos argument to tell R to look in the official jamovi repository (our private server for jamovi-specific packages) in addition to CRAN:
# slow internet? you'll need to increase the R download timeout
option(timeout=600)  # 10 minutes

install.packages('jmvtools', repos=c('https://repo.jamovi.org', 'https://cran.r-project.org'))
2. Connect to jamovi
Once installed, verify that jmvtools can locate your jamovi application. Run:
jmvtools::check()jmvtools automatically searches standard installation locations such as:
- macOS:
/Applications - Linux:
/usr/lib/jamovi - Windows:
C:\Program Files
Note
Manually specifying the path
If jmvtools cannot find jamovi, you can manually point to the installation directory:
# Example for a custom path
jmvtools::check(home='C:\\Program Files\\jamovi X.X.X.X')
To save this path for your current R session, use:
options(jamovi_home='C:\\Program Files\\jamovi X.X.X.X')3. Install an Example Module
Now that your environment is ready, let’s test it by installing the Base R module.
- Download the source code: Download .zip
- Unzip the directory and open the
jmvbaseR.Rprojfile in RStudio. - Start jamovi (ensure it’s running before the next step).
- Install the module by running:
jmvtools::install()What happens next?
Switch to your open jamovi window. You should see a new ‘Base R’ menu on the ribbon.
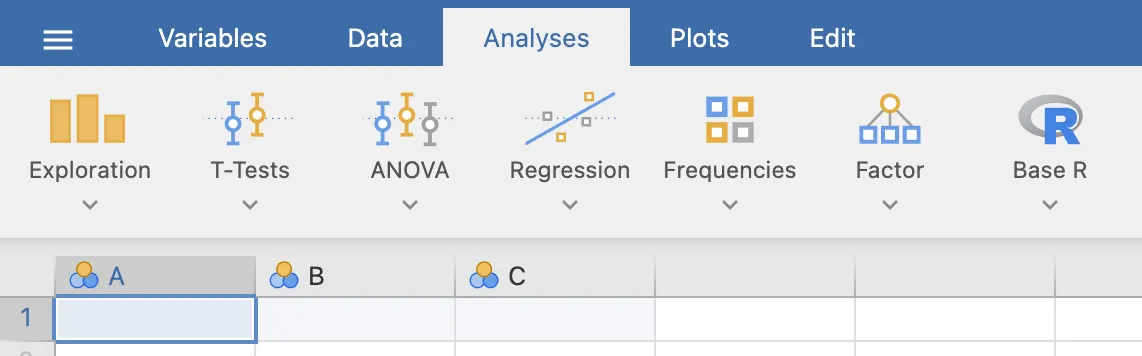
The appearance of this menu proves that jmvtools successfully compiled the module’s source code and injected it directly into your running jamovi instance.
With your environment perfectly configured, we are ready to move on to the fun part. Let’s create a brand new module from scratch and build your first analysis.