Input Checks
Your analysis now works — but try removing the variables from the inputs in jamovi. You’ll see a confusing error message in the results panel. In this section, we’ll fix that by adding an Input Check.
1. The Problem
By default, jamovi runs your analysis as soon as it’s opened. If the user hasn’t provided the required variables yet, R will throw an error while trying to construct the formula.
Try removing len and supp from your analysis in jamovi. You’ll see a generic error message in the results panel:
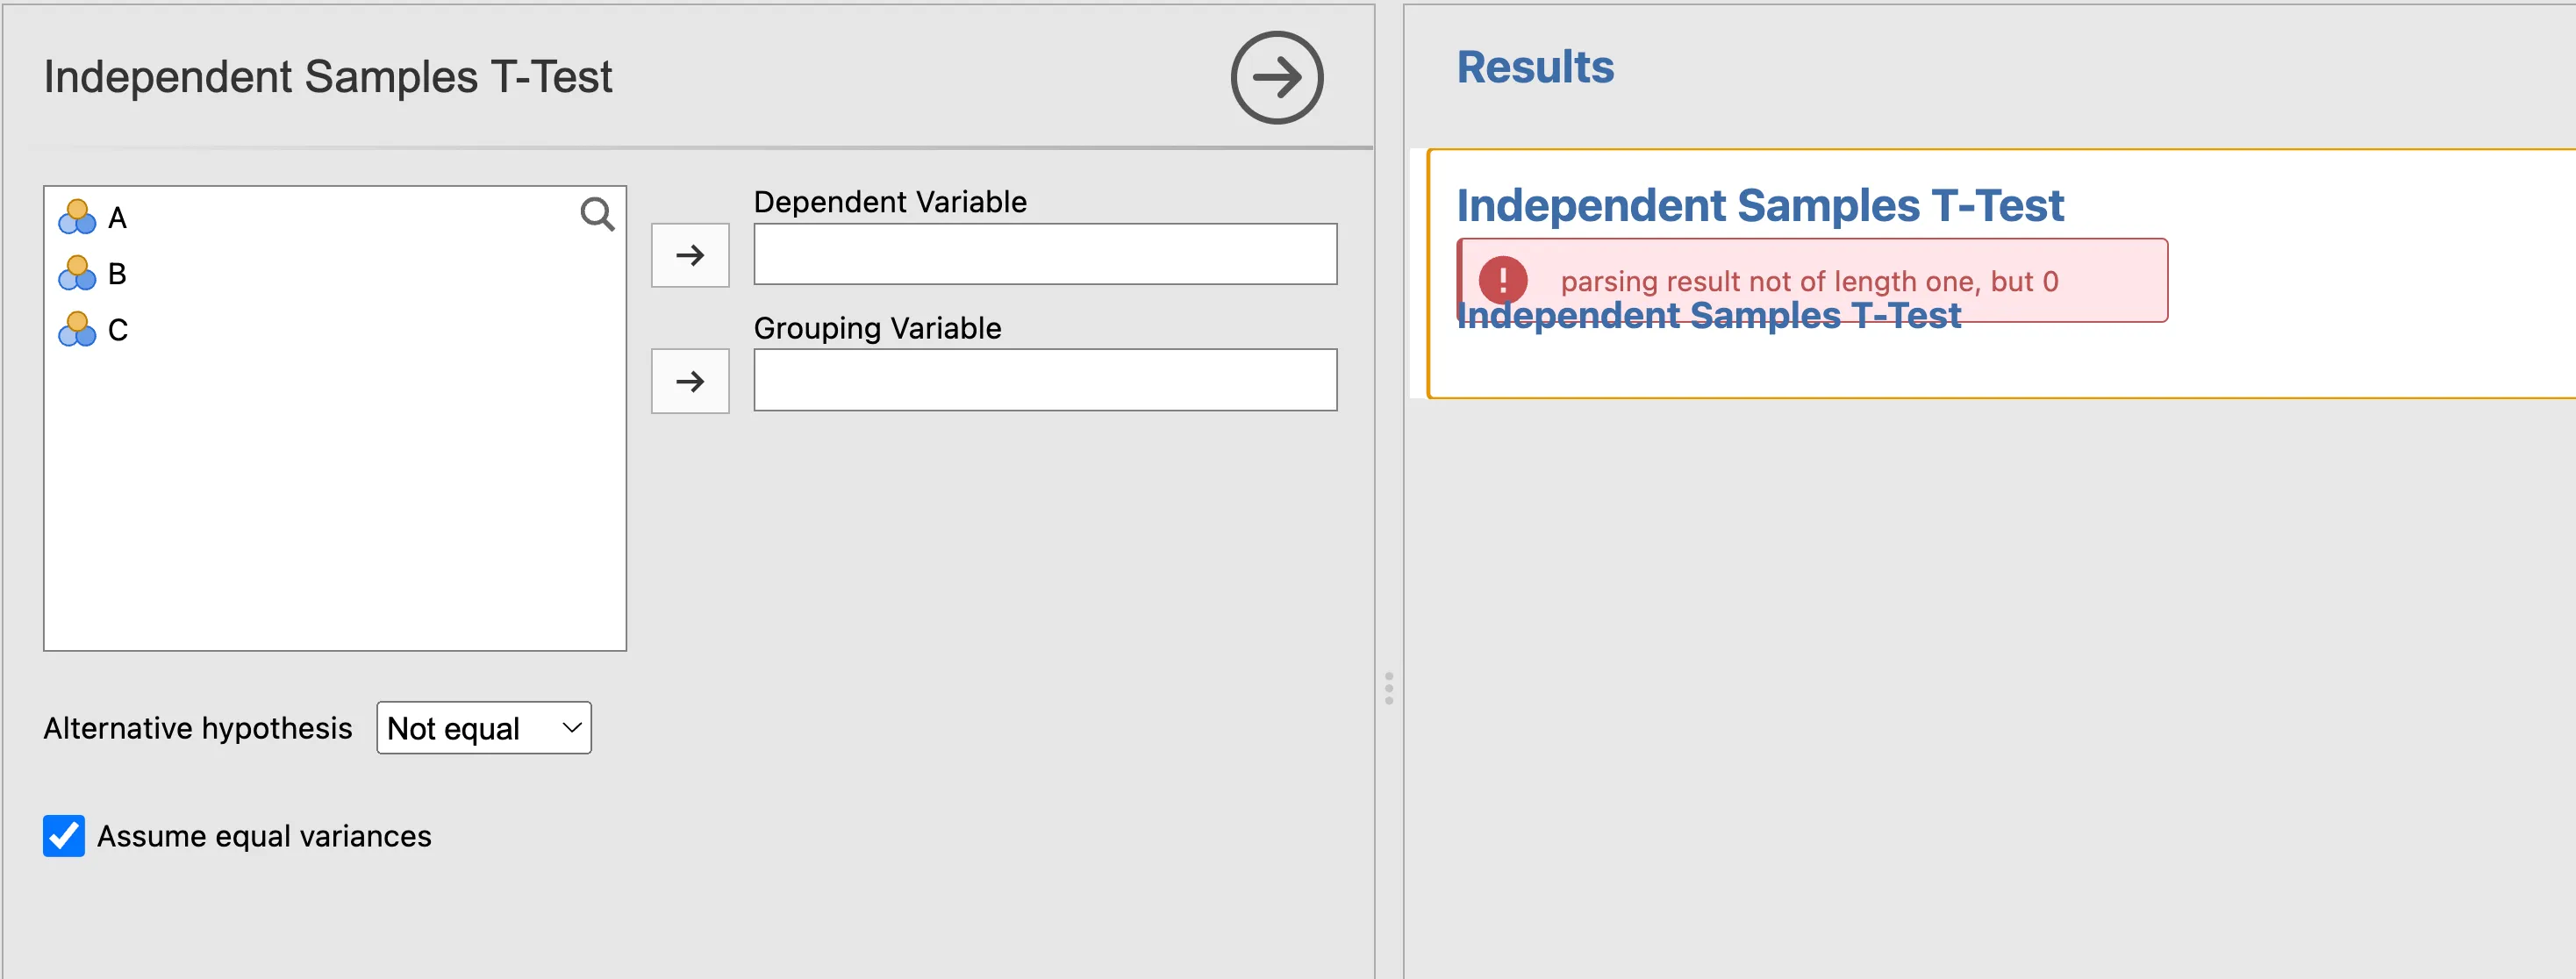
This isn’t technically a bug — it just means the analysis ran before the user was ready.
Tip
Developer mode
How do we know exactly what went wrong? To get more insight into R errors, you can enable Developer Mode in jamovi. This will show you the actual R error message and a full stack trace.
- Click the App Menu (three dots in the top-right corner).
- Toggle Developer Mode to On.
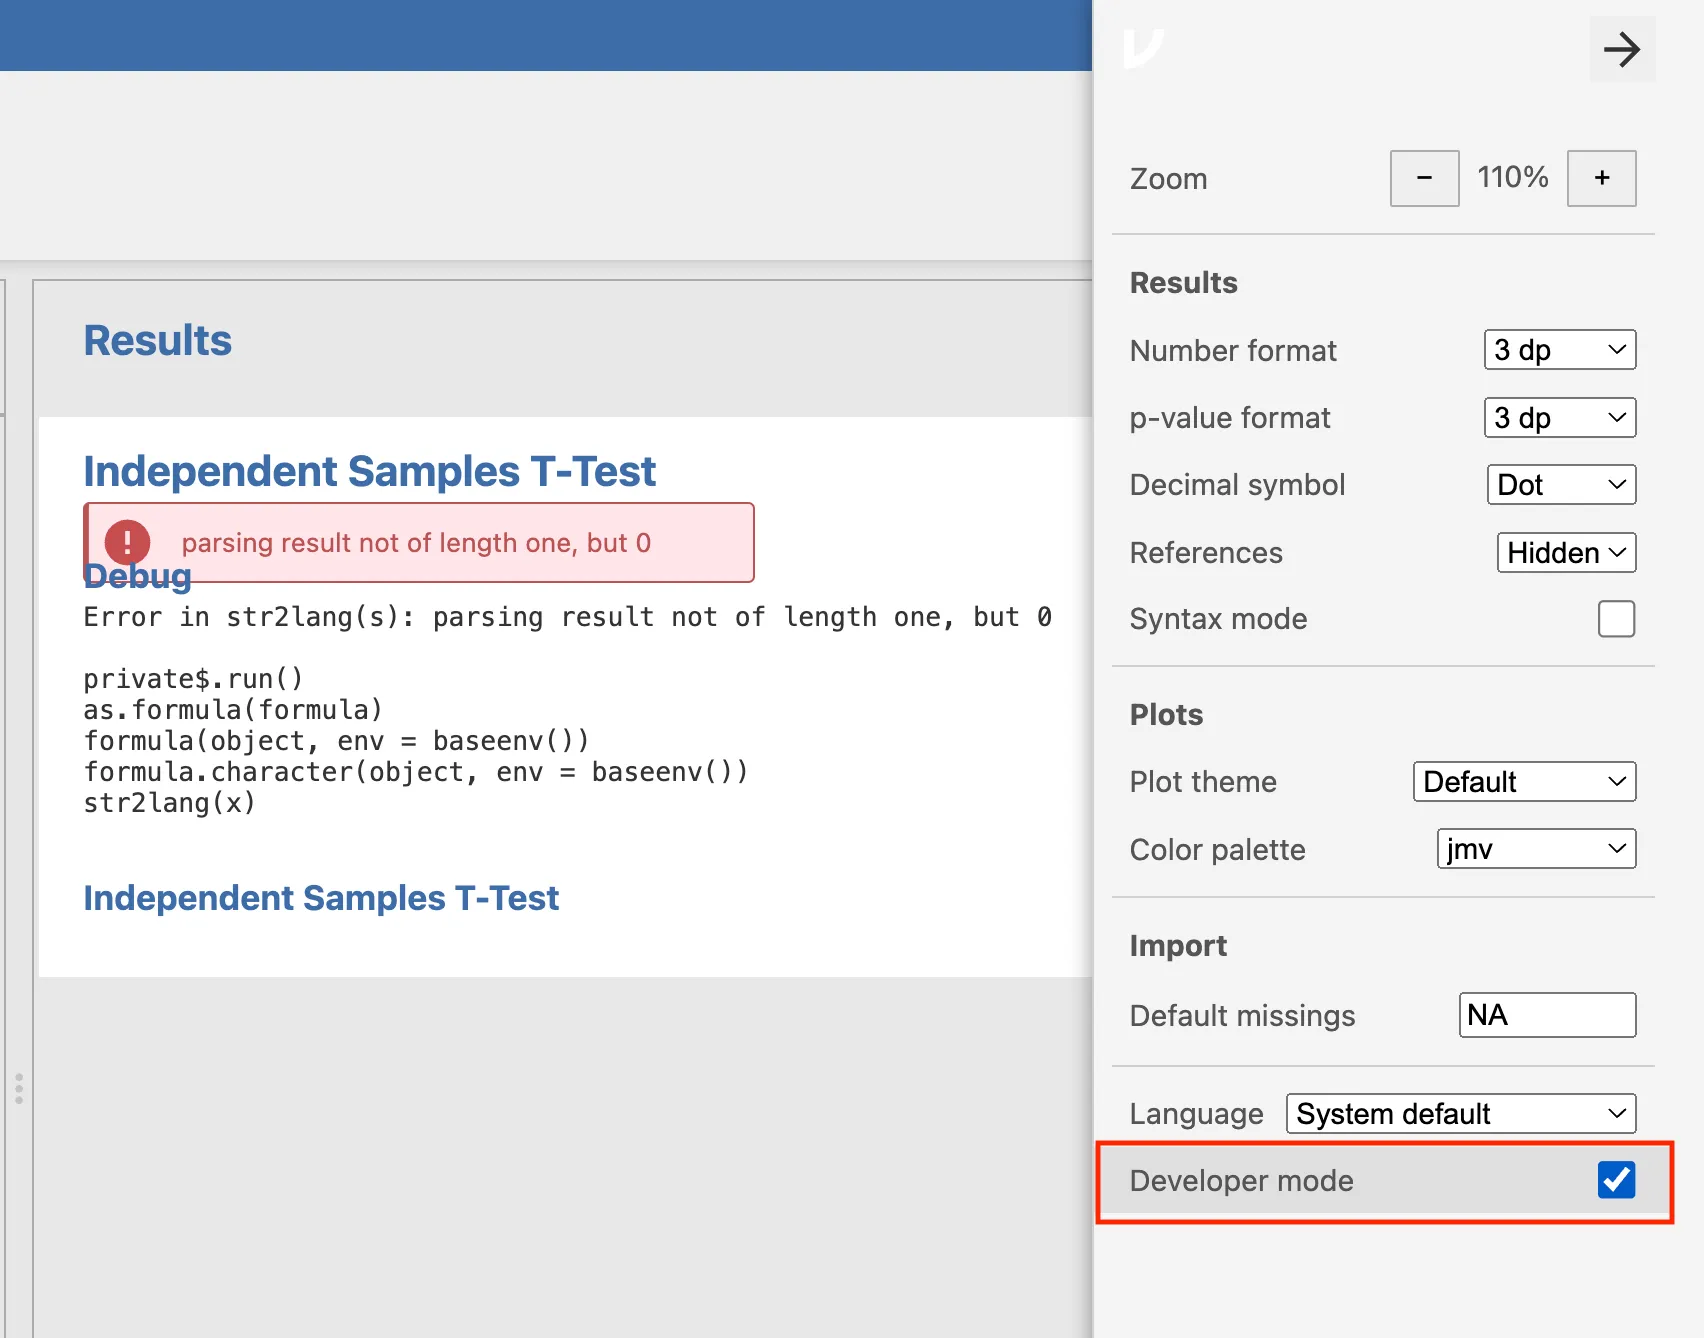
With Developer Mode enabled, you’ll see that the error is length 0, occurring at the as.formula() call because it received an empty string.
2. The Solution: Exit Early
We add an Input Check (also known as an Early Return or Guard Clause) at the very top of our .run() function. This tells R: “If the required options are empty, stop here quietly — don’t show an error.”
Modify your R/ttest.b.R to add the check:
ttestClass <- R6::R6Class("ttestClass",
    inherit = ttestBase,
    private = list(
        .run = function() {

            # 1. Input Check: Stop quietly if inputs are missing
            if (length(self$options$dep) == 0 || length(self$options$group) == 0) {
                return()
            }

            # 2. Construct the formula
            formula <- jmvcore::constructFormula(self$options$dep, self$options$group)
            formula <- as.formula(formula)

            # 3. Run the analysis
            results <- stats::t.test(formula, self$data, var.equal=self$options$varEq)

            # 4. Populate the results panel
            self$results$text$setContent(results)
        })
)
Now reinstall with jmvtools::install(). The results panel will stay clean until both variables are assigned, providing a much smoother user experience.
Tip
Make this a habit. Input checks should be the very first thing you write in every .run() function. You’ll carry this pattern forward through all the remaining sections of this tutorial.
Next Step: Now that your analysis is stable, let’s understand the model behind jamovi’s results system before we build something more powerful: The jamovi Results Model.